Knowledgebase
Portal Home > Knowledgebase > Exchange Hosting > Auto Account Setup for Outlook 2010
Auto Account Setup for Outlook 2010
Â
1. On your local computer, click Start, then control panel and select the Mail icon.
2. Select Show Profiles, then Add.
3. Provide a descriptive name for the mail profile, for ex. Exchange, and select OK.
4. Enter your name, email address and email password, and select Next.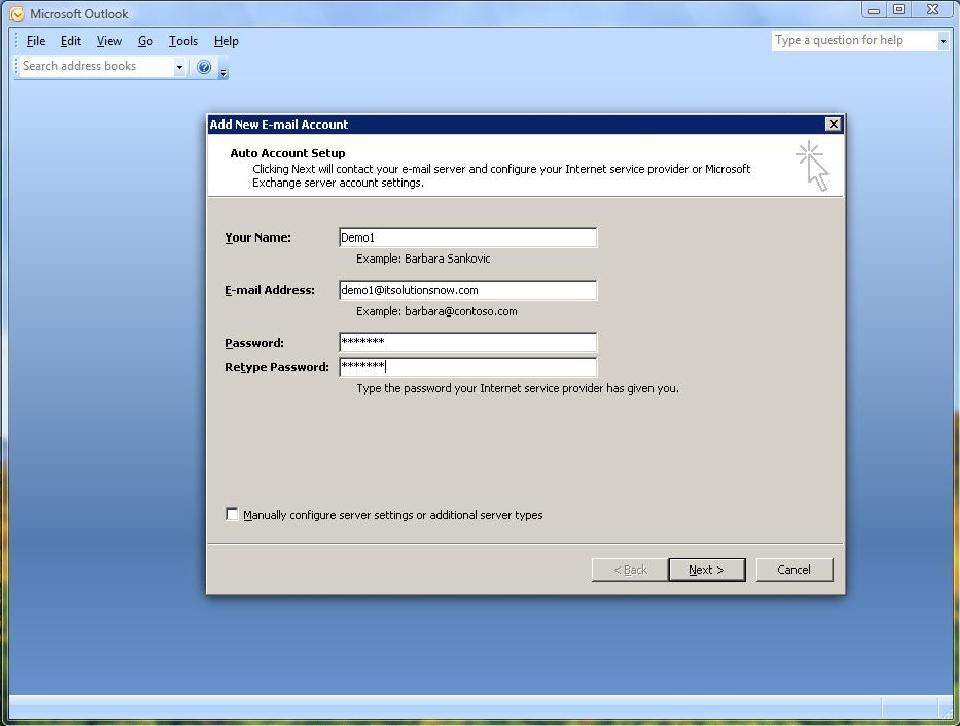
5. When prompted to "Allow this website to configure 'email address' server settings, select Allow.
6. At the login prompt, enter your email address as the username and your email password and select OK.
7. Upon completion of the mail profile configuration you will receive a Congratulations message which will indicate the e-mail account is successfully configured to use Microsoft Exchange.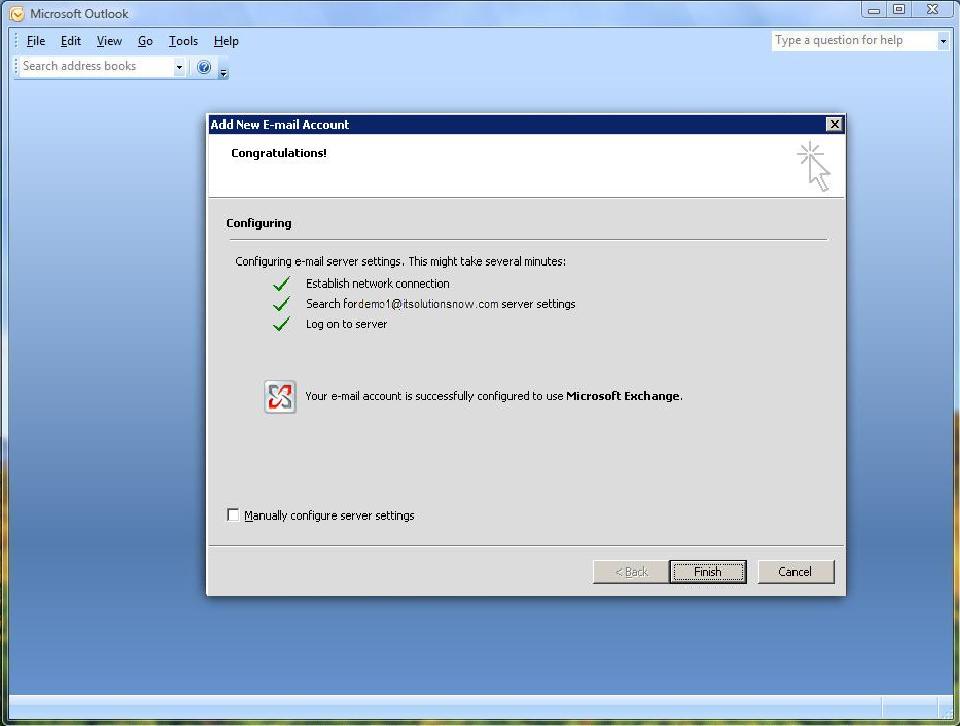
8. Select Finish and OK.
If there was a pre-existing mail profile, you can specify a default mail profile by opening the control panel, select the Mail icon, select Show Profiles, select Always Use this Profile and use the drop down box to specify the profile created above.
9. Open Outlook. When prompted to login, enter your email address for the username and your email password. If you receive the one time prompt to allow this website to configure 'email address' server settings", select Allow.Â
 Add to Favourites
  Print this Article

Support Center Quick Links
Search


