Knowledgebase
Portal Home > Knowledgebase > CRM Hosting > How to configure Internet Explorer to work with CRM
How to configure Internet Explorer to work with CRM
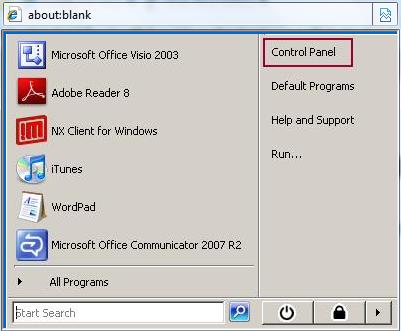
1.      Navigate to the control panel by going to the Start menu and then click “Control Panel
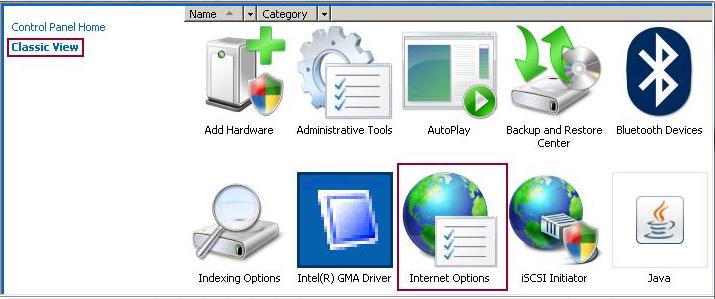
2.      Click on “Classic View” then locate and click the “Internet Options” icon
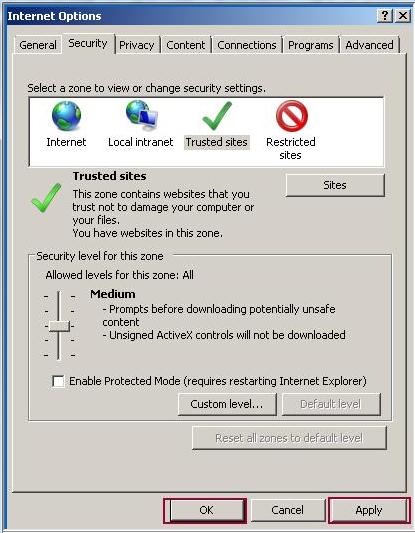
3.      Next click the “Security” tab. Then press the “Reset all zones to default level” button.
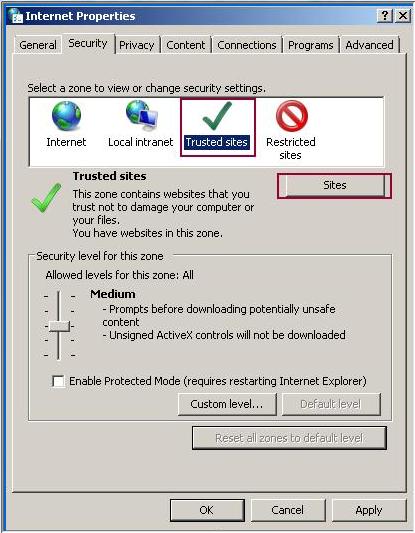
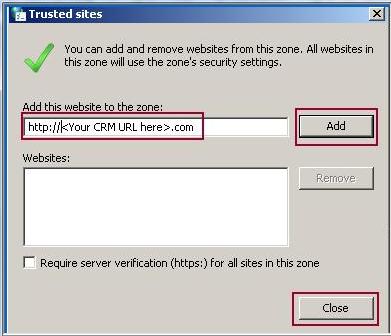
4.      Now click the “Trusted Sites” icon, and then the “Sites” button.
5.      Next, enter the URL of your CRM into the “Add this website to the zone:” field and then press the “Add” button and finally the “Close” button to accept the changes.
Tip:
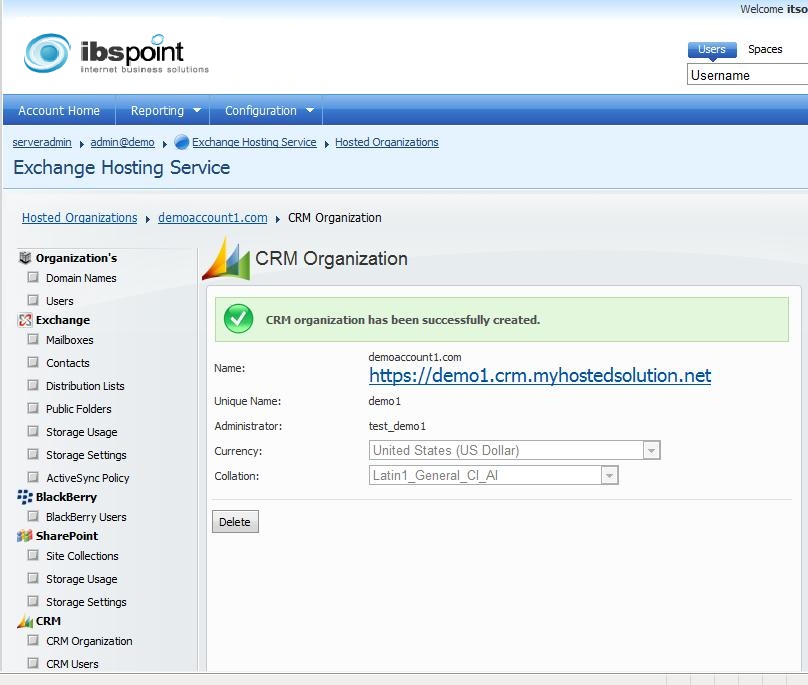
To find your URL of your CRM site, simple log into your control panel, then under CRM Organizations you will find the URL to use:
6.      To accept the changes, press the “Apply” and then the “OK” button.
 Add to Favourites
  Print this Article

Support Center Quick Links
Search


